Barcode Position & Logic Explained
Introduction
This document provides an example of a properly formatted mailing document layout, highlighting the key elements that must be present to meet standards in DFS printing, and inserting. This serves as a visual guide for quality assurance teams, production staff to verify that all barcode layout components are correctly positioned and functional across each stage of the mailing process.
Purpose
The purpose of this document is to demonstrate how a well-prepared keyline and barcode should look and function. By following this example, DFS can prevent production errors, and ensure smooth and compliant workflow from printing to mail delivery.
It emphasizes critical elements such as:
- Barcode readability & positioning
- Insert logic
Printing Department Scope
The printing team is responsible for ensuring the visual and structural quality of the printed document. Key layout elements include:
- Barcode Placement: 2D barcodes must be fully visible, unobstructed, and positioned for machine readability.
- Print Mode & Pagination: Ensure the correct duplex/simplex print mode and verify pagination sequence.
Inserting Department Scope
The inserting team ensures the correct assembly and integrity of the final mail package. The layout must support:
- 2D Barcode Functionality: Barcode must be scannable and follow correct logic to trigger the appropriate insert components.
- Insert Configuration: Inserts must be loaded correctly in hoppers with matching binary codes per job specifications.
Barcode Layout Guide
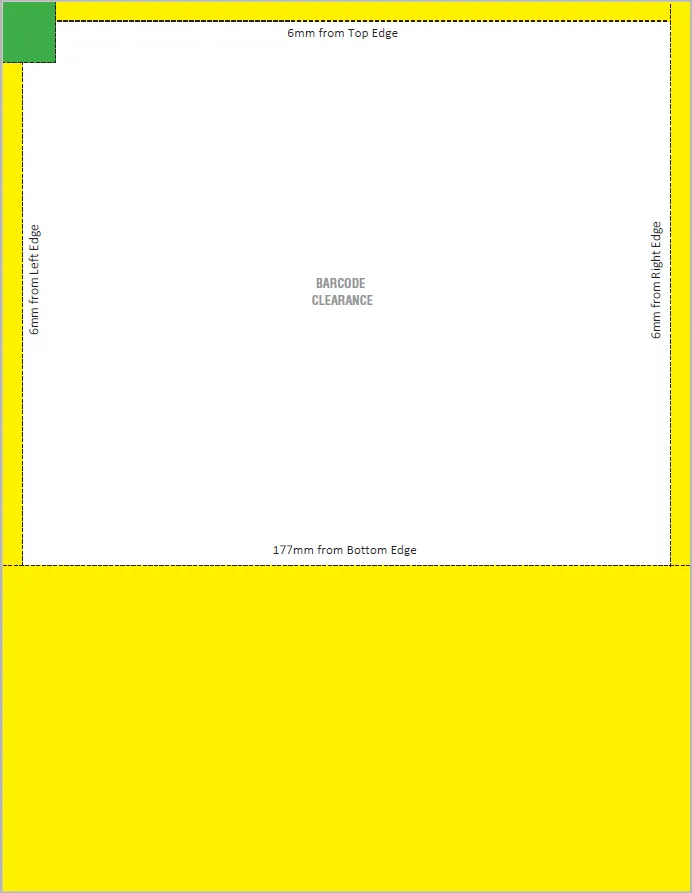
This outlines the barcode clearance requirements for placing a barcode on a mail piece (sheet of paper). To ensure readability and compliance, the barcode must be surrounded by a clear white space or Barcode Quiet Zone.

For optimal placement:
- Letter-sized pieces: Position the barcode adjacent to the recipient address.
- Flat (non-folded) pieces: Position the barcode in the top right or top middle area of the piece.
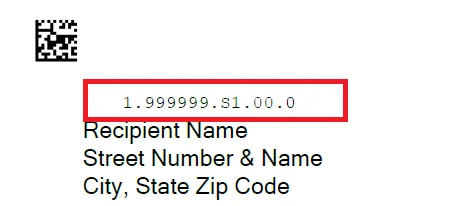
Example of a DFS Generated Keyline
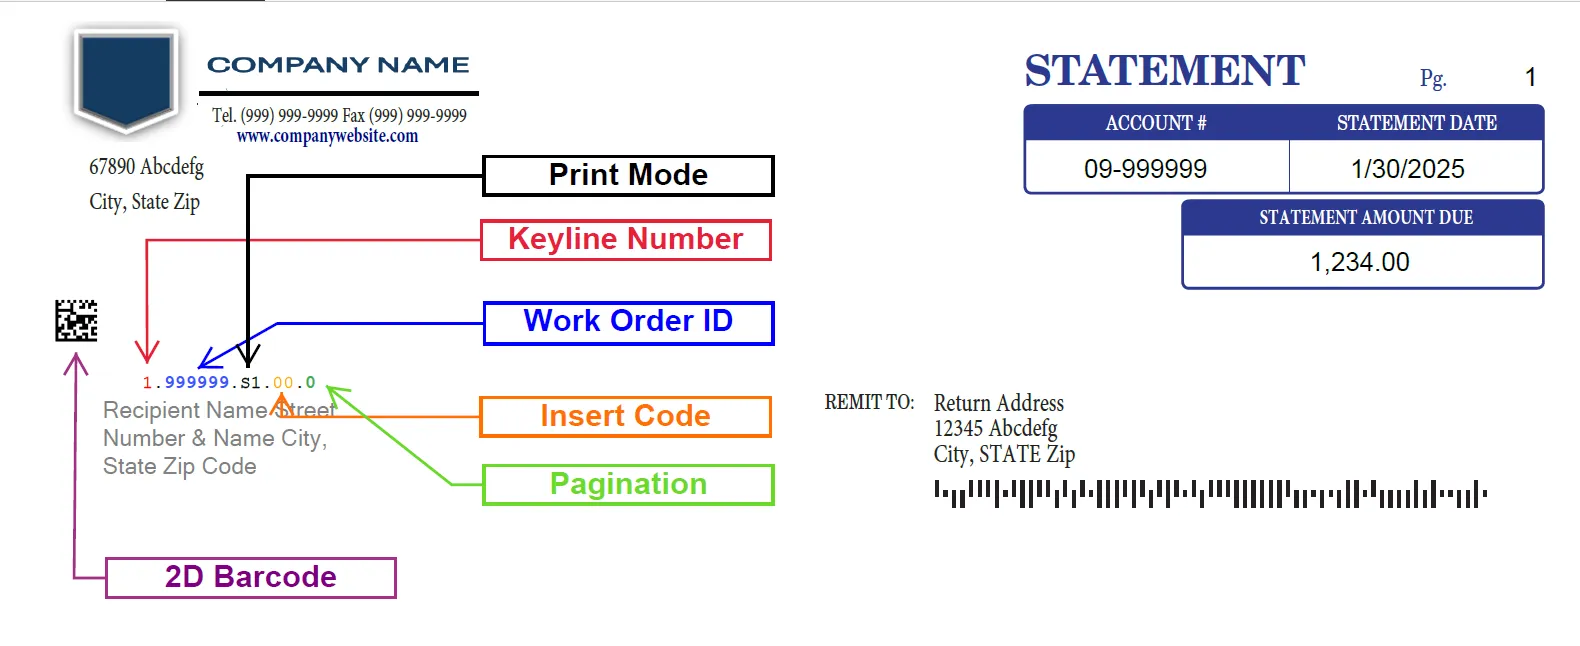
Keyline - This is a DFS-generated sequence of numbers printed on each mail piece to uniquely identify and track individual recipients within a job. Typically located next to the recipient's name and address, the keyline appears in sequential order and serves as a reference point for tagging, sorting, and quality control. This first digit in the keyline represents the initial data point, followed by additional coded information relevant to the mailing process.
Work Order ID - This is a unique identifier assigned to a specific job. This serves as a reference number that links all job-related details to an electronic work order that provides clear instructions on how a job should be handled from end-to-end workflow.
Print Mode - This digit in a Keyline sequence, shows how a job is setup to be printed -S (Simplex) or D (Duplex )- it determines the requirement of how that mail piece should be printed; One-Sided or Two-Sided.
Insert Code - On jobs that require additional insert materials, such as flyers, brochures, or return envelopes, an insert code is added to the keyline data line to aid production teams on configurating equipment to correctly call, pull and insert into the required mail piece(s).
Pagination - Refers to the numbering and sequencing of pages within a document or mailing set. This pagination process ensures that all pages belonging to a single recipient are printed, grouped, and inserted in the correct order.
Binary Code in a 2Barcode - Every document must include a barcode that is essential to the inserting process for each job. This barcode contains pagination and insert component data, which instructs the inserting equipment on which inserts to pull and how to assemble the pages. It ensures that all pages intended for a single recipient are accurately grouped, ordered, and mailed correctly.
Revision History
Revision Date | Updater Name | Description |
|---|---|---|
May 5, 2025 | Angelica Gonzalez | Initial draft |
May 22, 2025 | Angelica Gonzalez | Updates |
| | |