Standard Address Positions
Introduction
In this industry, accuracy and compliance with USPS regulations are critical to ensuring timely delivery and cost-effective processing. Maintaining uniform address placements is critical for proper alignment and/or folding during the insertion process and for seamless USPS processing. Inconsistent positioning can lead to misreads, rejections, or mailing delays.
Purpose
The purpose of this document is to define and standardize address positions within all mailing projects to ensure consistency, and accuracy throughout production. One important quality control measure used in DFS production is the Tap Test. This document outlines the purpose, and importance of this test as it relates to address visibility and mail piece integrity. By incorporating a tap test during the testing phase, all DFS teams can proactively identify and resolve potential address position issues. This preventive measure supports operational efficiency, minimizes rework, and ensures every piece is accurately inserted and USPS ready from the start.
Examples of Address Positions
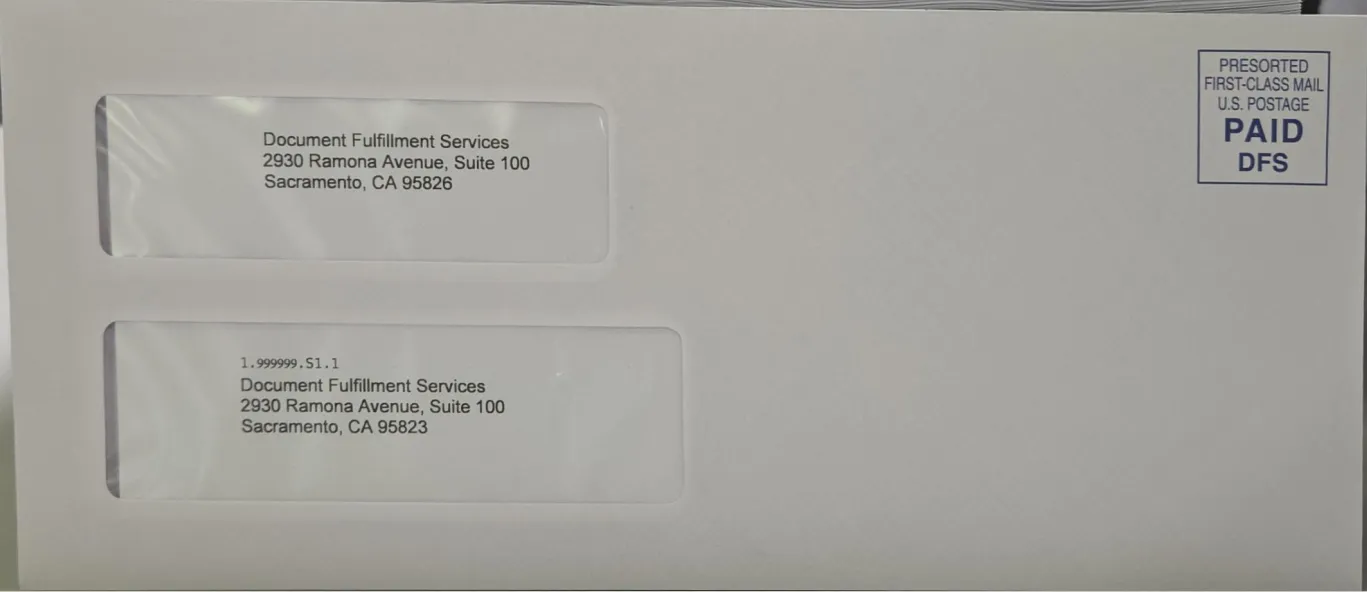
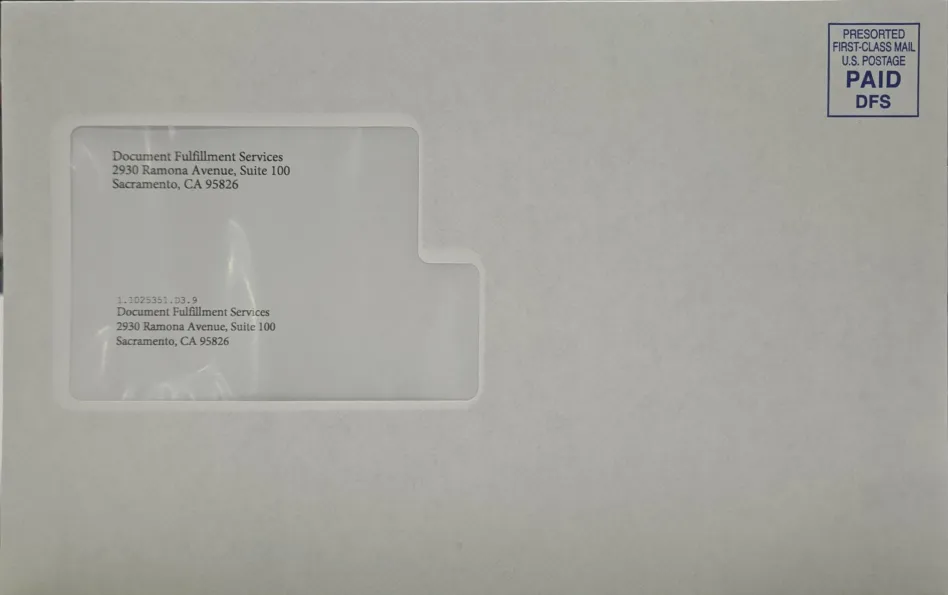
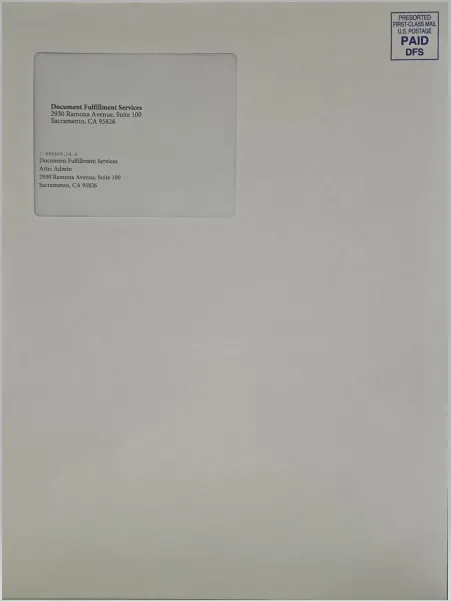
In the examples below, you'll see DFS's suite of envelopes, each featuring perfectly formatted address placements tailored for different mail types - Letters (Letter-Fold or Z-Fold), Letter6x9 (Half-Fold), and Flats (No-Fold).
These layouts ensure professional presentation and optimal mailing processing time.
Letter in a #10 Envelope |
|---|
 |
Letter6x9 in a 6x9 Envelope |
|---|
 |
Flat in a 9x12 Envelope |
|---|
 |
Address Position Requirements
To qualify for automation discounts and efficient delivery, the USPS requires addresses to:
- Be clearly visible through the envelope window or printed directly on the envelope.
- Be parallel to the longest edge of the mal piece
- Be formatted according to the USPS standards
- Including ZIP+4, and consistent font
- Use a 10 to 12-point font size
- Include a delivery address line, and city/state/ZIP
- Fall within the OCR Read Area:
- From the bottom edge: 5/8" minimum
- From the left and right edges: 1/2" minimum
- From the top edge: 2-3/4" maximum
Consequences of Poor Address Positioning
Failure to meet address position standards can result in:
- Mail piece rejection from automation, can require manual processing and can incur extra costs.
- Delivery delays due to unreadable addresses or misrouted mail.
- Returned mail if addresses fall outside the readable window.
- Wasted postage and inventory costs due to reprints or remailing.
- Inserting Department can have folding issues setting up your job if the addresses are not consistent causing all of the above issues.
Helpful Tips for Creating a Mailing
- Use window envelope template examples to design address areas and test positioning.
- Conduct a Tap Test during testing to ensure the address remains within the window.
- Use address block bounding boxes in your layout file to control spacing.
- Include a 1/8" to 1/4" safety margin around the address area inside the window.
- Test with actual stock and envelopes before final production.
- Standardize address blocks with style sheets or template.
Size Requirements for Automation Mail
To qualify for USPS automation rates and to ensure proper processing:
Mail Piece Type | Minimum Size | Maximum Size | Maximum Weight |
|---|---|---|---|
Postcards | 3.5" x 5" | 4.25" x 6" | 1oz |
Letters | 3.5 x 5" | 6.25" x 11.5" | 3.5oz |
Flats | 6.125" x 11.5" | 12" x 15" | 13oz |
- Pieces must be uniformly thick and flexible for sorting machines designed to go at high speeds.